Hanging a beautiful Christmas wreath on your front door tells the world that the festive season is here. A Christmas wreath signals to visitors that your house is a place of seasonal celebration and they will receive a warm welcome. Traditionally, the evergreens on display in a Christmas wreath held out a hope for prosperity during the dark winter months – but today we are much more adventurous about what our wreaths contain and how they are styled.
The wreaths in The Real Flower Company Christmas Collection are put together by our expert florists using sustainable ingredients grown on our Hampshire farm. But if you are tempted to make your own individually styled Christmas wreath at home, this year for the first time we have created a wreath-making kit that makes it easy and fun to do.
You can order it here. And then just follow these simple steps. Our founder Rosebie will also be hosting online wreath-making workshops via ZOOM – you’ll be sent an exclusive link to join when you buy the kit. A replay of the live workshop will also be available to watch at your leisure from Tuesday 1 December.
ORDER YOUR WREATH MAKING KIT >
Ingredients
Each of our wreath-making kits contains the following ingredients:
- • Metal wreath ring
- • Reel wire
- • Moss
- • A selection of freshly picked foliage and berries from our sustainable Hampshire farm
You will also need:
- • Wire cutters
- • Scissors
- • Ribbon
If you don't have wire cutters, we have high quality secateurs and Japanese floristry scissors available to purchase on our website, which will work perfectly.
Instructions
1. Attach the end of your wire to the wreath ring.

2. Take a generous handful of moss, compact it by pressing it together between your hands.
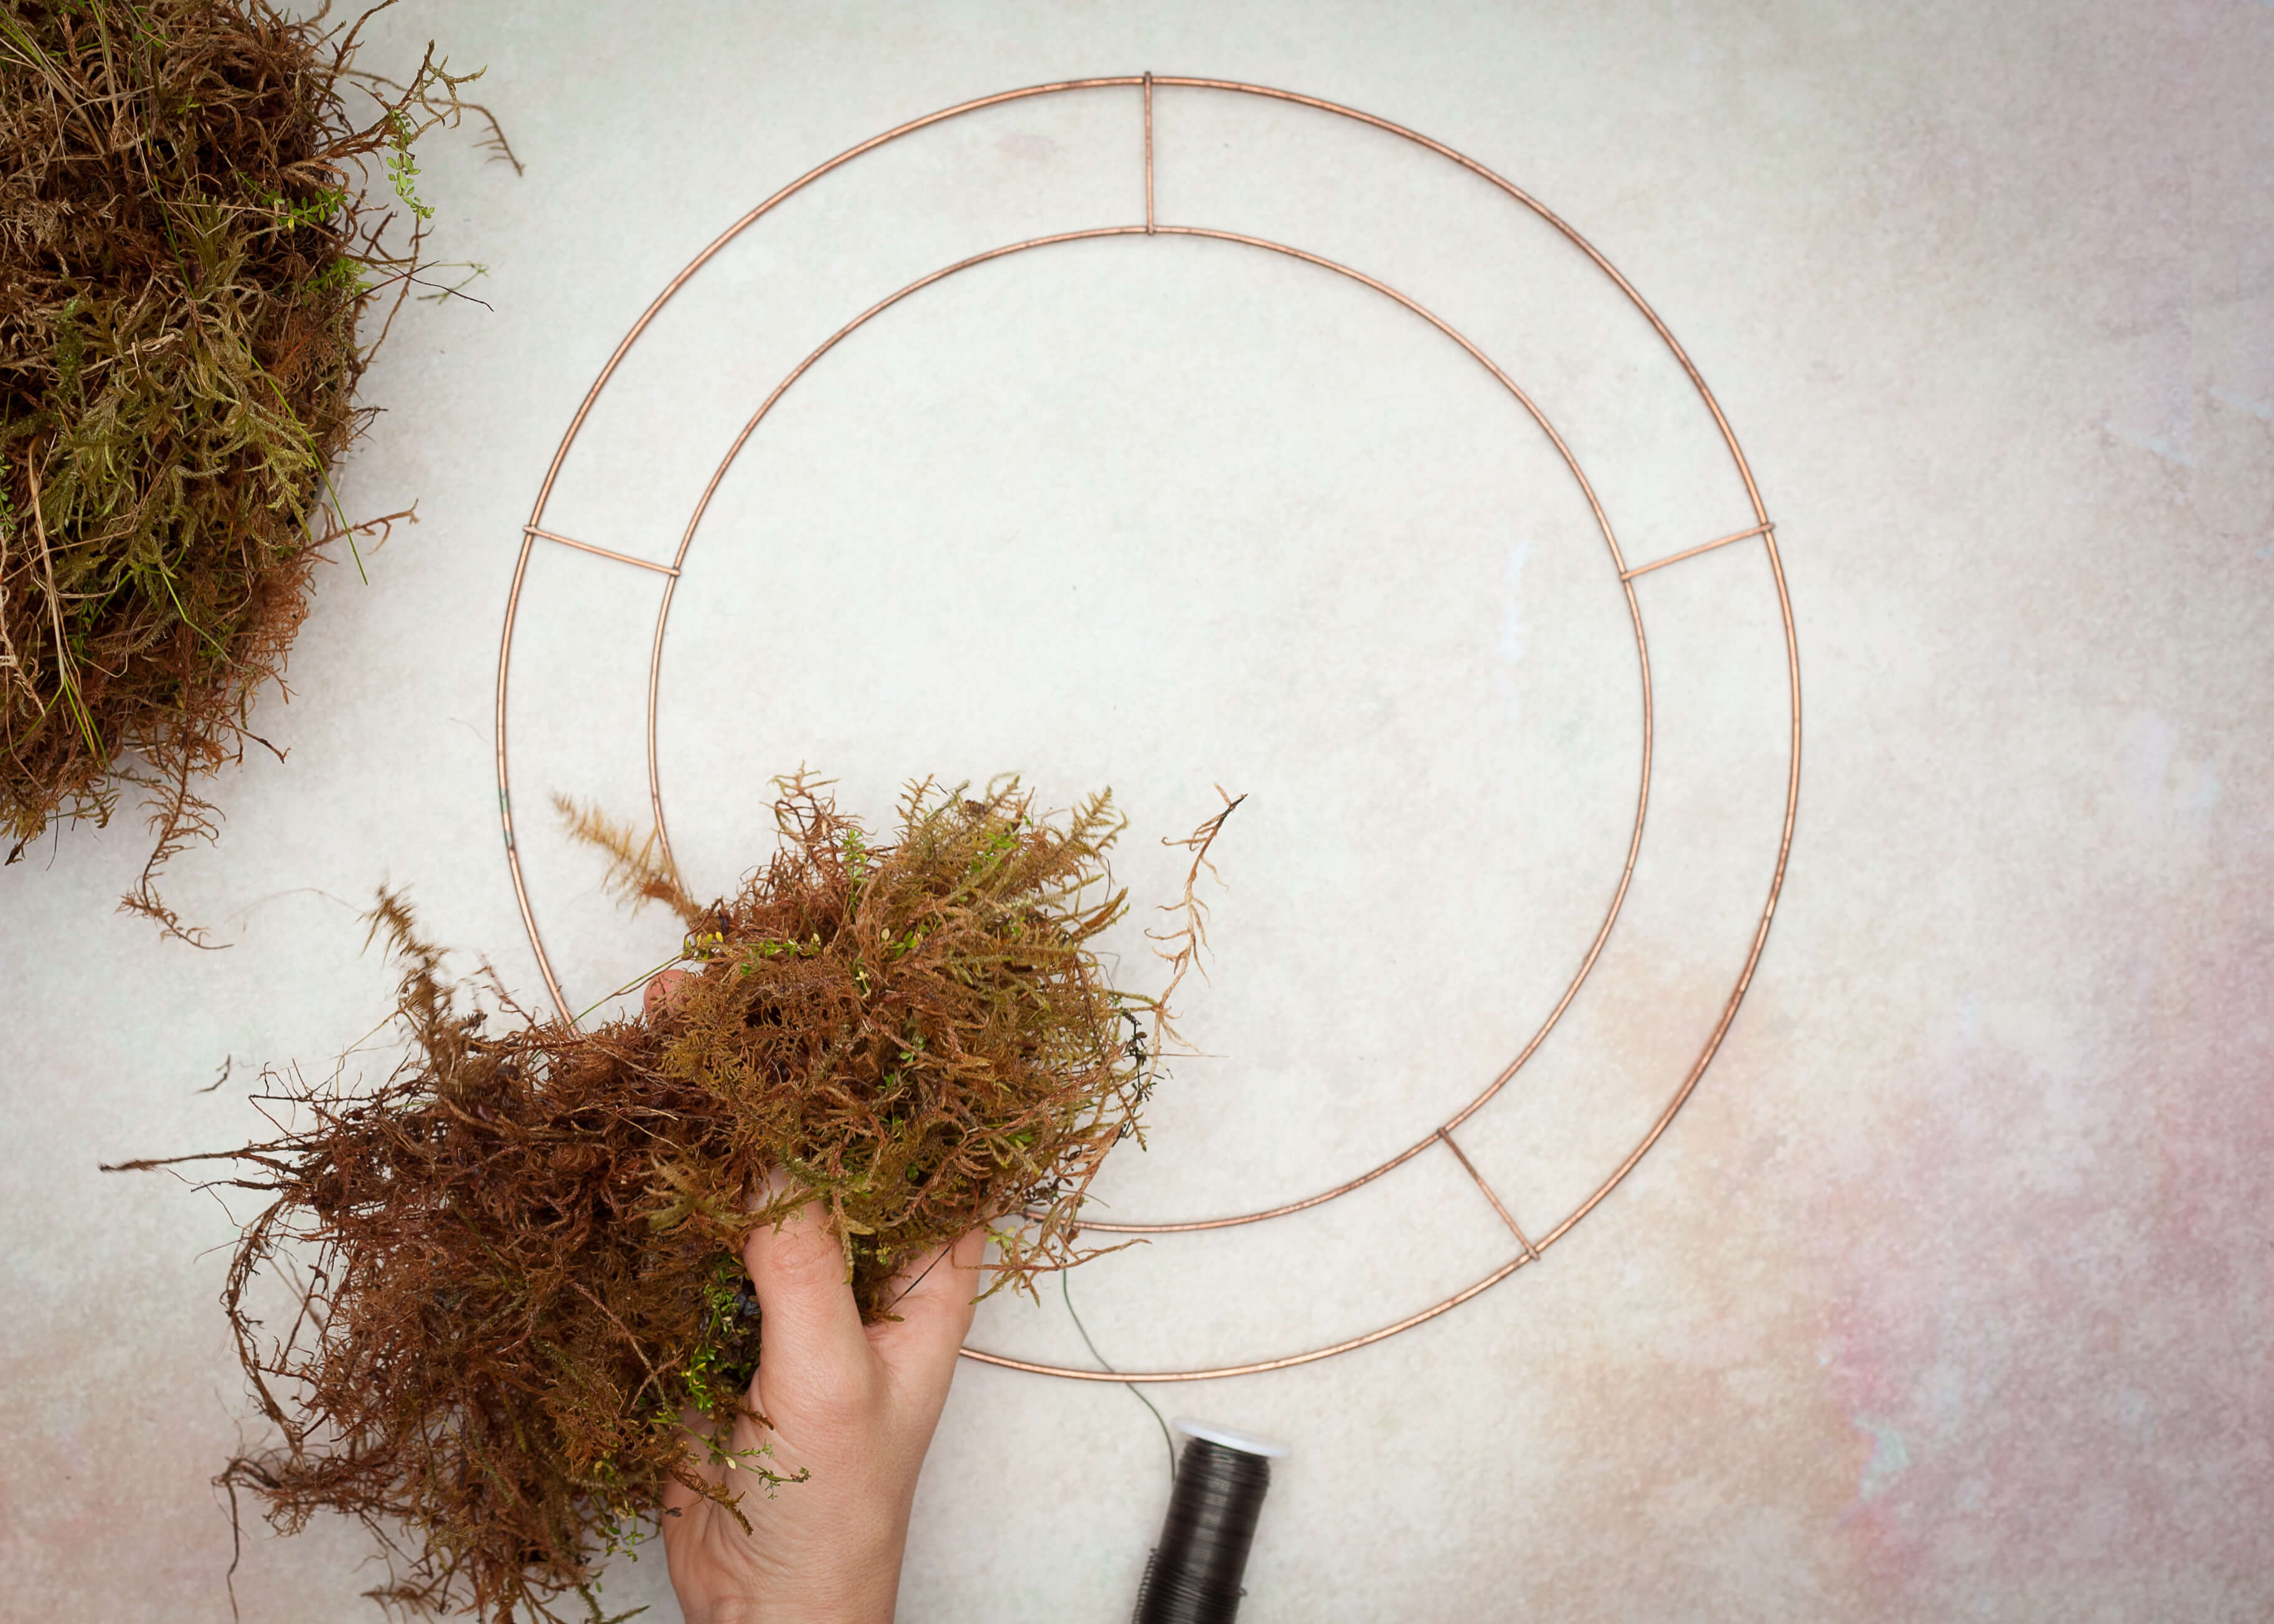
3. Place the compressed moss onto the ring and secure it in place by wrapping the wire around it two or three times (the wire should remain attached to both the wreath and the spool throughout).

4. Continue adding the moss a handful at a time until the wreath ring is fully covered (don’t forget to press the moss together before placing each handful on the base). Use all of the moss supplied to give your base a generous covering.


5. Cut your foliage and berries into pieces around 15cm / 6” in length and remove the leaves from the bottom 2-3cm / 1”.
TIP: Cut the stems over the cardboard box the moss was delivered in to make tidying up at the end quicker. The leftover stems and leaves can then be composted or if you have young children you could use leftovers such as scented eucalyptus leaves for sensory play.

6. Create small bunches from about five of your pre-cut stems – our florists suggest placing the more robust foliage at the bottom and layering more delicate leaves or berries towards the top.

7. Place your first bunch on to the wreath ring, gently inserting the end of the stems into the moss to help keep the wreath fresh then wrapping the wire around the bottom third of the stems to secure the bunch.
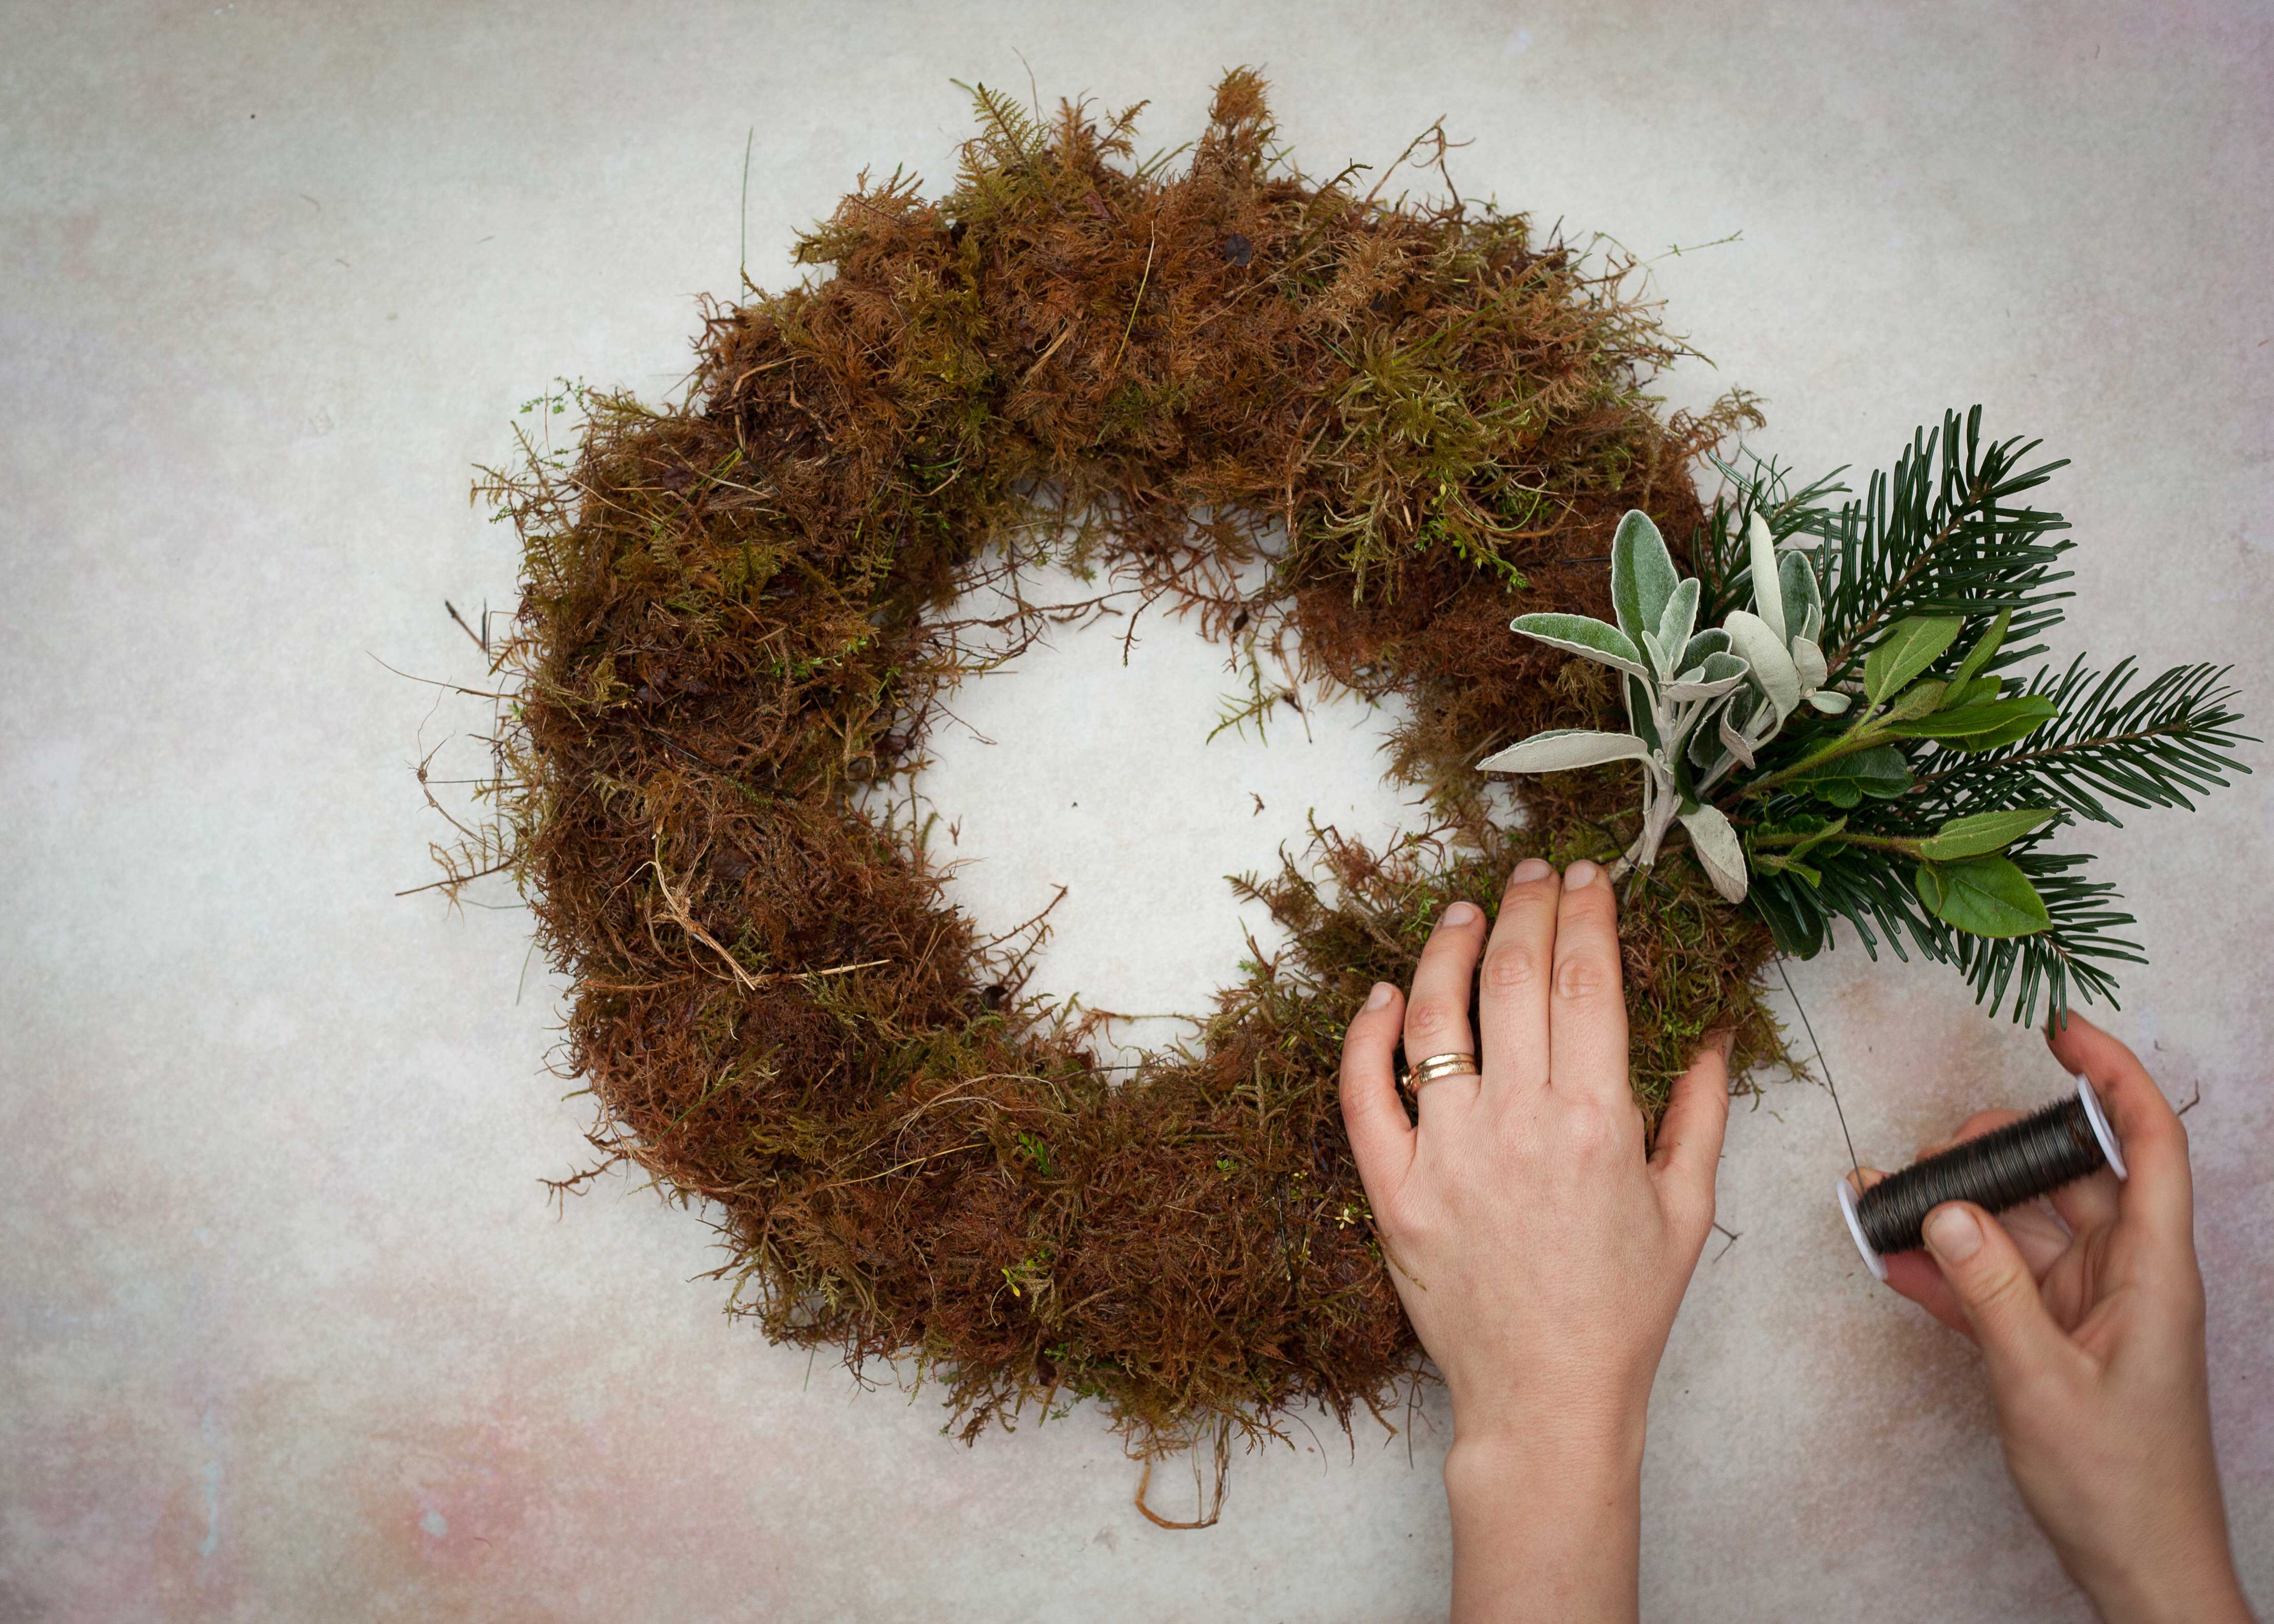
8. Keep adding bunches, each time covering the base of the previous bunch so all the moss is fully covered. All the bunches should face in the same direction, but it works well to alternate between placing one facing slightly inwards and one slightly outwards.
TIP: Our florists suggest working in odd numbers, so if you are adding a decorative element like red berries then go for 3, 5 or 7 clusters. At the end you can plug any gaps by poking a few extra stems in to complete your design.

9. Continue until you’ve filled the whole wreath.
TIP: A few times during the making process prop your wreath up and take a step back so you can see how your design is progressing.

5. Finish with ribbon – you may want to add a bow or just a loop for hanging.
Frequently Asked Questions
Do I need to use all of the moss and foliage?
We’ve provided you with the right amount of moss and foliage to make a generous and full Christmas wreath. However, this is your design, so you can use as much or as little as you like. If you are making a full wreath, as shown in the product image, then we would suggest using all of the moss we’ve provided for the base.
A few bits have fallen out of my wreath – what should I do?
Re-cut the ends and carefully insert the stems back into the wreath.
How much space do I need to make my wreath?
We’d suggest around the size of a small to medium kitchen table or standard desk – though some people prefer to work on the floor or outside. If your table is easily marked then make sure you place a protective covering down first.
I don’t have wire cutters.
A sharp pair of scissors or secateurs should do the job. We also have high quality secateurs and Japanese floristry scissors available to purchase on our website, which will work perfectly.
I don’t have ribbon.
If you don’t have ribbon, you can use twine or wire to hang your creation.
My design looks wonky – what should I do?
The beauty of each wreath is that it is different. You may want to go with it to create an asymmetrical design or go back a stage to re-adjust your creation. If you have stems left at the end you can also go back and fill in a little afterwards – just try to make sure any stems you add are carefully inserted into the moss and feel reasonably secure.
Can I use the kit to create a more wild or natural design?
Yes absolutely! To do that we suggest you have more variation in the lengths you work with and fan out the stems in your bunches.
Can I add extra elements to my wreath?
Yes, of course. This is your creation, so you can be as free as you wish in embellishing and adorning your design.
How long will my wreath last?
We suggest hanging your wreath in a cold, sheltered place. You can take down your wreath and gently spritz it with water to refresh it, but we’ve found that our wreath kits tend to dry beautifully. In the right conditions, your wreath should stay looking fresh for at least ten days but can still look beautiful for much longer. If you’re hanging your wreath for several weeks, you may wish to tease out and refresh some of the elements with stems from your garden, hedgerow, local florist or one of our Fresh from the Farm Flower Boxes.
Our expert florists here at The Real Flower Company have designed a range of Christmas Wreaths that runs from traditional festive red and green to cool Nordic white – you can browse the collection here. But if you are making your own wreath, remember there are no hard and fast rules for Christmas – so be bold and allow your creativity to flourish. Do share your creations on social media and tag us @therealflowerco